Sunday, March 5, 2017

Adapting Paul Thumbie shifter brackets to Nitto handlebars

While setting up a road bike recently for a friend who needed a riser stem set-up, I wanted to mount thumb shifters on top of Nitto B-135 handlebars. Nitto drop bars that have a diameter of ~23.6 mm on the stepped down section of the bar. Paul "Thumbie" shifter brackets, that allow putting Shimano bar end shifters on top of handlebars only come in two diameters, 31.8mm for road bikes or 22.2 for mountain bike handlebars.


I found a work around, by making shims from a section of a 26.8 titanium seat post cut-off then sawing a slot to get the right fit. The result is a very lightweight shim to make Paul Thumbie shifter brackets work for traditional style Nitto drop handlebars.

Tuesday, February 14, 2017

Two Rock/Valley Ford 200K


I'd been interested in doing a randonneur (long distance) brevet ride for a while. But for one reason or another, hadn't gotten around to it. Besides commuting by bike, I'd been doing 30-40 mile rides on weekends and occasional 70-90 mile rides to the coast and back from where I live in Palo Alto, CA.

In California, we’ve been having a lot more rain this winter, (thankfully, helping to curtail a four-year drought). But after recent storms, Saturday, February 11, looked to be clear and the timing seemed right for me, so I signed up for the Two Rock/Valley Ford 200K, one of a series of brevet rides organized by the San Francisco Randonneurs club. Founded in 1990, San Francisco Randonneurs was formed to help create qualifying rides for one of the largest brevet events of all, the Paris-Brest-Paris 1200K, that takes place every 4 years in France.

A brevet is a long distance endurance ride with a time limit. The word brevet means certificate and refers to the card used to verify completion of control points along the course. Brevets are non-competitive endurance rides, each rider competes against the terrain, conditions, the clock and their own personal best time.

The Friday before this 200K, that would be my first, it was raining. But I got out at 6:30 am and did a 30 mile ride on a local rolling hills loop (Portola Valley/Woodside) to check my bike, an Ebisu all-arounder that I’d set-up for touring including aluminum fenders, a short front rack, handlebar bag, front dynohub, LED headlight and 700×32 tires.


I had the bars too low and the saddle, a used Fizik Arione was not the best choice for a 200K ride. I swapped the saddle with a vintage Avocet and adjusted the bar height higher. I had made two handlebar bag supports out of stainless steel struts, that looped over the bar in a “p” clamp shape and a “u” shape on the bag end so the flap would clear where the support connects to the bag, that I bolted to the supports, a "bolt-aleur" hack as opposed to the more refined decaleur brackets with two vertical tube mounts that you can easily remove and remount the bag. I replaced the bolts with quick-release pins made out of aluminum binding posts I drilled to secure with R-clips. The handlebars needed to be raised about 1/2 inch, but the bag base still was on the front rack so I didn’t have to make new supports for the higher bar position.


It was a busy day at work Friday, but late in the day I got my gear together and rechecked my bike. Rather than drive to San Francisco very early on the morning of the ride, Friday night I took CalTrain to San Francisco and stayed with friends in the Excelsior district.

On Saturday morning, fueled with two rice crackers topped with almond butter, I left at 5:30 am and rode 8 miles to the brevet starting point at East Beach, Crissy field. It was strange to ride through mostly empty San Francisco streets in the dark early hours. I thought I might get a coffee along the way, but nothing was open, not even Four Barrel coffee on Valencia.

While on Van Ness, another rider came up alongside on a vintage Specialized Sequoia with fenders and a front bag. I asked him, “SFR?” He said yes. I had a nice chat with Eric W. for a bit while he led me to a short cut to East Beach. In the parking lot, riders were pulling bikes out of their vehicles and getting set-up, the glow of a full moon shined just above the Golden Gate bridge that was lit-up against a clear, dark sky. After checking in and signing the release form, I got my brevet card.

Riders gathered for a special announcement. San Francisco Regional Brevet Administrator, Rob H., presented the American Randonneur Award of the year to long-time SF Randonneurs member Bruce Berg, for his service, support and welcoming of all riders, no matter what level of experience.

Since it had been raining the last few days, an update of the course road conditions was given: a small landslide on the road into Sausalito from the Golden Gate bridge, possible flooding on the road near Valley Ford and alternate routes, water running over Highway 1 in a few places towards Tomales Bay and in general more, debris on the road. Then we were all asked to raise an arm and repeat an oath: (Raise your right hand or your other right hand and repeat after me) "I, Insert my name here, promise not to do stupid stuff".

Shortly after, we set-out at 7:00 am from East Beach towards the Golden Gate bridge in the cool morning light. The riders quickly set a brisk pace, we ascended the small climb and looped around under the massive Golden Gate bridge and rode across on the west side span. As we rode I could see the distinct shadows of riders right behind me on the left railing in the morning sun. We continued through Sausalito, then to a bike path and onto the first modest climb at Camino Alto, continued down a snake like decent and though a series of bike lanes on the way through Mill Valley, Corte Madera, Larkspur, Ross, San Anselmo on the way to Fairfax. I saw Eric on the Sequoia, again, stopped to fix a flat. He seemed to be back quickly though as he passed and rejoined the group ahead not long after. A few miles into the ride I could see the lights of a police car. Hopefully not an accident! Fortunately not. An officer was giving a cyclist a ticket, presumably for running a stop sign.

I was leap frogging with two riders, Ethan and Manny who I struck up a conversation with. We stopped for espresso in Ross, which was welcome, because I hadn’t been able to get coffee before the ride start. I ordered a machiatto, bought a small breakfast burrito that hit the spot, and we we’re on the road again, Ethan mentioned they’d ridden the Pierce Point 200K recently, that has about 1000ft more elevation gain (~7400') than Two Rock/Valley Ford (~6300') and was very cold and wet. I mentioned it was my first brevet and they offered some tips and encouragement. Manny mentioned a lot of it is fighting your level of discomfort towards the end.

I’d tried to prepare by bringing the right gear. I brought rain pants, a gore-Tex shell, extra gloves and shoe covers, even a small first aid kit. I’d put foam shoe pads in my cycling shoes anticipating foot pain over extended mileage. It was a clear day and I could have taken less gear.

We got to Fairfax and continued on Sir Francis Drake boulevard. The last I saw of Ethan and Manny was on the climb after Fairfax, I rode most the rest of the course, solo. I had done the Fairfax climb before out to Roy’s Redwoods and remembered how steep it was. This descended into the pastoral San Geronimo Valley and then a right on Nicasio Road and more climbing, it leveled off past Nicasio reservoir. There were many road cyclists also out for a Saturday ride, that was turning into a spectacularly clear sunny day with very little wind. Next up was White’s Hill a very steep climb probably steepest of the ride and on to Petaluma. Approaching Petaluma I noticed along the side of the road, instead of beer cans, kombucha bottles!

In Petaluma, I stopped at the 7-11 where I bought sports drink, a bag of plain potato chips, two protein bars, and kept the receipt to verify reaching the control point. I’d made the time limit for Petaluma with 30 minutes to spare and clearly now riding last. On White’s Hill with the steep climb and a large group of road riders quickly dropping me I was having second thoughts, that maybe I’d turn-around at Petaluma. But I felt pretty good, and it was such an amazing day. I looked at the brevet card time limit for the second control at Valley Ford, the cue sheet indicated was only 20 miles away. Doable! So for the rest of the ride, I tried to focus only on the next control/time limit and keep up a steady pace.

The ride to Valley Ford was an ocean of undulating green hills and fields of yellow mustard flowers. I could hear birds and the occasional moos of cows. There wasn’t too much traffic and a very wide shoulder which was great. I didn’t have a cyclometer, and hadn’t charged my phone the night before, so with only half a charge, I left my phone in my jersey pocket. It was interesting to pass connector roads I’d ridden on before in the Petaluma area.

Closer to Valley Ford I started to get pain in my feet, I’d kept my shoes on the loose side because I know feet tend to swell on long rides. I still had shoe covers on so this wasn’t really helping and it was getting warmer, so I removed these. Once I got my foot out my old school quill pedal, toe clip set-up, my feet were good.

I had some saddle discomfort earlier but it went away. One thing I knew, my 10 cm handlebar stem was a little too long in length. I periodically brought my fist to my shoulder while rotating my arm to make up for holding my arms extended on the brake hoods much of the ride, that helped.


I had only had a couple of minor mechanical problems. The front derailleur had somehow gotten bent previously and would not align in some of the highest gears, it was either ticking as inside of the crank arm touched the derailleur plate or the inside plate rubbing on the chain. Somehow I missed this on my test ride the day before. Also, while on a rough section of a climb on Highway 1 from Valley Ford I noticed some rattling, it wasn’t anything up front. It turned out the bolt for the rear fender bridge bracket was loose. I’d brought a Campy T wrench, so was able to tighten the bolt on the inside of the fender with a quick removal of the rear wheel.

The ride to Point Reyes Station was one of the longer segments at 21 miles, but was also one of the most memorable riding in the rolling hills along the water's edge. After a few climbs the road passed through the small town of Tomales. The road had new asphalt and was relatively flat as it wound along Keys Creek that turns into a wide river as it meets with the northern end of Tomales Bay. The road had three or four short sections that had flooded, but not deep so easy to cross on a bike. I just had to avoid crossing while cars were also crossing on the other side to avoid getting splashed. Most of the major flooding had seemed to have subsided. Highway 1 to Point Reyes Station had very little traffic, with only the sound of waves lapping the shore of Tomales Bay riding the rolling hills along the bay in the afternoon sun was an absolute joy.

Not having a cyclometer, I tried to measure the distance in my mind based on familiar rides I’d done. Many years earlier I had ridden a motorcycle with a friend from Oakland to Marshall at dusk, so remembered this town, not much had changed. Today deck patios in a few places were filled with people feasting on oysters and enjoying the pristine afternoon. Once reaching the base of Tomales Bay the road shifted East and I remembered of few land marks. A cheese farm and a former dairy, now a winery. I dropped into the idyllic town of Point Reyes Station and got a coffee and Bovine Bakery, making the time limit by 5 minutes. Only about 39 miles left.

I got a sandwich at the market across the street and watched the tourists while I ate, then back on the bike south on Highway 1. I realized later I did not top off my water bottles. I knew there would be a few climbs, but was hoping they wouldn’t be as hard as some of the others. I turned left on Sir Francis Drake and ascended the first climb. I was feeling OK, I was worried on rolling hills along Highway 1 next to Tomales Bay because I was feeling a twinge behind my left knee that felt like I my cramp. But I kept drinking fluids and it never materialized. The road entered a beautiful section of Redwood forest on Sir Francis Drake Road that winds along Lagunitas Creek, that was flowing abundantly from the recent rains. The road surface was smooth, but with a little more traffic now, with people returning from the coast late in the day. I could see the water flowing west, so yes, there was going to be another climb, it was just a matter of when. I passed through Lagunitas, then the beautiful San Geronimo Valley. It was starting to get dark now and my water was dwindling. I passed Nicasio road where the course had turned right on the way out. Then, as if by magic, I noticed a fountain about 20 feet from the road next to a golf course. So I filled up, had the rest of my sandwich, and headed for the climb into Fairfax.

The climbs coming back were more gradual than heading out which was good. I was glad I had a front dynohub and a bright LED headlight especially on fast descents in the dark on roads with narrow shoulders. I got to Fairfax and had only ridden the series of bike paths once before. Now that it was dark, how was I going to read the cue sheet directions? Fortunately I brought a bar mounted battery powered light as backup and used that to read the cue sheet I had in the top sleeve of my handlebar bag. I made my way through the towns and bike paths leading back to the Golden Gate bridge and realized I may not make the event time limit. I tried to pick up my pace. I was feeling it in my knees, but no cramping, so, all good.

On the final climb to the bridge and with time running out I wasn’t familiar with the exact route and the directions were not that simple. Then, out of nowhere, an older rider on a mountain bike zipped by me and went left, clearly headed towards the bridge. I followed him to the locked gate, he pressed the button and after a few seconds the gate opened with a loud buzzing and we proceeded across the two mile bridge span as the moon hung in the sky against the San Francisco skyline. Mid-span I had 10 minutes to go, I passed the mountain biker and went as quickly as I could, got through second gate. I asked the rider who caught-up with me at the gate, how to get to Crissy field and he directed me to the path. I followed the cue sheet directions and got down to Old Mason and back on the path along Crissy Field. In the dark it was hard to see East Beach, I got to Alviso, I had gone too far and checked my phone. A voice mail had been left checking my status. I had missed the cutoff time by ten minutes. I called the number gave an update, apologized for not calling sooner, he said some members were still at East Beach and about to leave, and I met up with them. They were extremely friendly, glad I was OK and very encouraging.

When I got receipts at Valley Ford and Point Reyes Station I realized the registers didn't print the correct time so, in an act of randonewbieness, I photographed my watch, which was basically, silly.


Valley Ford


Point Reyes Station


Then after I finished, in an endorphin induced euphoria, I wrote 18:40 instead the correct finish time of 20:40 on the brevet card, having finished at 8:40 in the evening

Even though I had very slow times, I made all the control cut-off times except the last one, so I knew the ride would not officially count. But I finished the 126.5 mile course and on a spectacular, unforgettable clear day. Afterwards, I rode back to CalTrain with the days journey lingering in my mind. No one could have experienced this day I had on a bike, while driving a car. Between the 200K brevet and riding to and from CalTrain, I rode just over 142 miles, the most I’d ever ridden in a single day.


Being my first brevet, I learned a lot. I knew from longer rides I’d done, it’s partly a mind game. Looking at the cue sheet and focusing on the next control point and time limit was helpful, breaking the ride down into manageable sections without being overwhelmed by the entire distance.

Next time I would do more long distance riding in preparation. Make sure the bike is completely dialed-in. Try to stay with the group and/or work with other riders to ride more efficiently trading off leads/drafts. Only bring what’s absolutely needed. Use a smaller handlebar bag. Go with lighter weight tires, I had used Panaracer Pasela TG tires, good and durable, but can be a bit sluggish. Bring an extra digital camera battery, a manual camera and lip balm.

With more training and better prep, I’ll definitely be back for more.


Epilog:

Since this ride, I completed nine 200k and one 300k under the time limits.

For anyone interested in expanding their cycling horizons, I highly recommend brevet riding and randonneuring clubs like the San Francisco Randonneurs [sfrandonneurs.org].


Friday, February 3, 2017

Eroica California 2016


The Spring 2016 Eroica California was the second edition of this vintage bicycle rally and festival held in the Paso Robles region of California’s Central Coast. The featured marque was Masi and coinciding with this, the weekend events kicked-off with a special VIP dinner attended by actor Dennis Christopher and with a screening of the 1979 film he starred in “Breaking Away,” a coming-of-age story in which he plays the lead character, rides a Masi racing bicycle, and loves all things Italian.

Going to Eroica generates a great feeling of anticipation. The vintage bikes, the roads, setting and interesting people make for a memorable vintage bike event. Saturday’s activities included a bike festival with a small swap meet section, sponsor and vendor booths and the vintage bicycle Concours d'Elégance (contest of elegance) and judging. There were rain showers during the day and the Concours took place in the main tent that would be used for the dinner later in the evening. The Concours this year was a showcase for Italian and other notable vintage bicycles. These included some amazing examples of major Italian makers and other more obscure brands. An early Brambilla with an adjustable stem stood out, in all it’s weathered glory.


The best of show was a Masi Grand Criterium that had originally been purchased by the owner when he was a teenager. It had been reconditioned at one point. Usually the judges prefer bikes in original condition (there is a separate category for reconditioned bikes), but they also like a good story behind the bike and the owner.

The dinner took place that evening with appearances by the Eroica bike rally series founder Giancarlo Brocci, who spoke in Italian with an English translator, former racer Andy Hampsten, who was at the 2015 event returned again, the only American to have won the Giro d'Italia, and actor Dennis Christopher. Veteran racer Luciano Berruti was also present again this year, with his 1899 Eagle Quad single speed that he rides with #1 on his jersey and bike. When he's not riding Eroica events, he's purveyor of Museo della Bicicletta in Cosseria, Italy.

At the dinner, I happened to sit at a table with Yoshiro Kato, an elder statesman of cycling and owner of Kato Cycles of Nagoya Japan. He was with his son, Shin and they were both there for Eroica and to attend the Sea Otter bicycle event taking place the following week near Monterey. Mr. Kato had a vintage bike of his own name and Shin was riding a very early orange Fuji Racer with beautiful chrome details. I don’t speak Japanese and they could speak limited English, but we could both speak the language of bicycles.

After riding the innaugural Eroica California event in 2015 (see Bicycle Quarterly #55, Spring 2016) and seeing such a dominance of Italian bikes, I thought it would be fun to rebuild a vintage French bike to ride in the 2016 event. In March 2015 I acquired a late 1950s Urago frameset in original condition. The frame seems lightweight for it's time, possibly Vitus tubing.


Over the following months I rebuilt it with vintage French components. Founded in 1901 in Nice, France, Urago had a long history of bicycles. It's factory closed in 1972 and their shop in Nice at 17 Avenue de la République, switched to motorcycles in 1997. It finally closed in 2008.

Urago made a variety of bicycle frames, many with highly finished Nervex lugs and chrome details. As a company founded by Italian emigrés, a Urago was the perfect crossover for Eroica. The frame I acquired has Nervex ornate lugs, a long fork offset, Simplex drop-outs and room for fenders so probably a sportif bike. It still had it’s original weathered black paint, with a red primer coat underneath showing in a few places and the original decals. Still on the seat tube was a dealer decal reading “E. Gamard, Cycles - CycloMoteurs, Agence, Peripagnan, France.” Emile Gamard was a successful racer in the 1930s.

I built-up a set of 700c wheels myself with vintage Atom alloy hubs and Super Champion Model 58 rims. 700x32 tires fit with enough room for Weinmann alloy short fenders. For gearing I added a Stronglight 49D crankset with 47 and 28 chainrings and a 14-26, 5-speed freewheel. This year, with a lowest gear of 28x26 I was able to stay on the bike on the tougher gravel climbs, The big difference in chainrings created some amusingly abrupt changes in pace, shifting to the inner ring while powering up on some of the climbs, but the set-up allowed plenty of gearing and slightly lighter weight.


The morning of the ride I rode from the motel to a cafe near the main square and had a nice chat with a rider from Arizona on an Alex Singer and his daughter who was riding a beautiful vintage Rossin. On the Singer, he said he’d unknowingly bought the bike, that had no decals, for $40 at a Goodwill store. When he’s mentioned it to other vintage bike fans, people have said, “Oh, YOU’RE that guy!” (word of the barn find had quickly spread through forums)

Coincidentally, this year’s Eroica rides took place on the same day as the oldest of the European one-day "classic" races, Paris-Roubaix. The weather for the Paso Robles area was forecast for rain and given that various sections of the ride would be on gravel, it was hard to tell how muddy it might be. The geology of the Paso Robles, however, consists of a fair amount of sedimentary soils. Even though there was rain on the days before the weekend event, most of the gravel roads absorbed the rain and there were very few places that were actually muddy and most all of the gravel sections I rode were in great shape.

The area of Paso Robles provides spectacular riding, especially in the spring. Rows of vineyards are highlighted by the varying topography and the many hills are green, sprinkled with yellow mustard flowers. The morning of the ride, there was very light coastal rain, but not enough to warrant even wearing a rain jacket. At the start, groups were staggered at intervals. By the first climbs riders spread out and you could go at your own pace not being crowded by groups as in larger cycling ride events.


I started the ride with tires at about 95 PSI. I had been riding Panaracer Pasela TGs previously, that are great tires, but they can feel a little sluggish in the wider sizes. Compass Stampede Pass tires, with their lightweight casing ride very responsively. These tires, combined with the newly built-up wheels and stiff Stronglight cranks with their narrow Q-factor width, the Urago was especially responsive on climbs. Urago was a small frame builder often having to compete with much larger bicycle brands, so they tended to put more into their handmade frames.

At 95 PSI the tires felt fast on the pavement, on the light gravel they felt pretty good as well, but the tires really seemed to come alive after I dropped the pressure slightly to between 85-90. At this pressure the bike absorbed the bumps but still seemed to handle excellent without feeling sluggish. Towards the end of the ride, not having full fenders some of the wet dirt accumulated on the chain that started to affect the shifting with the large difference in the chainring teeth, but mostly ok. The Compass tires were a perfect complement to this vintage lightweight Urago. Although the bike was over 50 years old it felt new with these tires.

Not knowing how well such an old Urago would do on a distance, I rode the short route this year. Having ridden last year’s medium event in the heat I thought the short route might be boring, but it wasn’t at all. The constant rolling hills were all the more interesting. With the gypsy guitar music of Django Rheinhart going through my head (“Twelfth Year”), each turn and hill revealed a new section of this splendorous area. Along the way it was fun to see so many different riders of all ages and the variety of vintage bikes from the US, Europe as well as Asia.

The routes had better markings this year, with more route signs, plus color coded arrow markers on the asphalt that more clearly indicated each of the three routes and where they split up that was very helpful.

At the rest stop at Olea Olive farm, we were served the traditional lunch of French fries and homemade garlic tomato sauce, plus a flat bed truck was filled with bananas and tangerines.
At Olea, I had a nice chat with Sasha from Citizen Chain in San Francisco, who was riding a sleek gray vintage Albert Eisentraut bike with his distinctive logo signature. Eisentraut, a long time frame builder in San Francisco Bay Area, who has taught many others his craft.

After this second checkpoint, the riders were spread out now, and one could enjoy the scenery along the route. In one section of white-ish gravel was highlighted against dark clouds in the distance, creating a dramatic landscape.


While many riders were older, there were a few younger riders participating. There was a father with his teenage son and daughter all riding Mondia bikes and custom matching racing themed T-shirts. John Fitzgerald, a frame builder based in Santa Rosa rode one of his beautiful randonneur bikes with a traditional fillet/lug combination on the head tube and seat stays that extend beyond the seat tube (similar to the frames of Jo Routens).


After finishing the short route, I was left wanting more… Overall this was another great cycling event, especially suited for vintage lightweight steel bikes.

As fans of classic Italian and other vintage bicycles grow older, while others discover and learn to appreciate traditional steel vintage bicycles anew, who will be the next generation of Eroica riders?

© 2016 Mark Eastman

Friday, January 20, 2017

Reconditioning a Vintage Charles Pelissier 650B Cyclotouring Bike


It was a winter day in San Francisco in 2007. I was working in the South of Market area. Late one day, I met with a friend who was moving soon to the Northwest. He knew I had been rebuilding bikes and said that he had an old French bike project that I might be interested in.

We met at his storage unit next to an old Greyhound bus service facility in the South of Market district.

My friend lifted the door of the storage unit and pulled out a weathered, slightly rusty frame. It was a very large road frame, the paint had been stripped and it was bare metal, but the original head badge was intact, it was triangular with red and blue bands and faint lettering that read Charles Pelissier.

The fork had a long offset and the rear drop outs were vertical, a tab for a generator was brazed to the left chain stay and the frame had mounts for cantilever brakes. My friend pulled out a box of very weathered old parts, some very oxidized zeppelin style fenders, LeFol Peon (“Peacock”) and brazed steel racks with built-in guards for the brakes. The wheels had a front "grand flask" hub and the rear, an Atom. The tires were completely dried out and cracked, imprinted "Dunlop Demi-Balon… 650B". I thanked my friend, bid him farewell and thus began my journey of discovery of an old French bike.

I tried to find out about the bike and its history. What was 650B? The alloy parts and lightweight frame seemed to indicate it was an above average French bike. In the process I found information about the Fédération Française de Cyclotourisme (FFCT) in France, and the traditon of randonneur and cyclotouring style bikes and their rides in magazines like Le Cycliste. I learned that 650B is a wheel size roughly in-between 700c road and 26" wheel sizes and well suiting for touring and randonneur bikes since it provides slightly better handling than 700c wheels and allows the use of wider tires within about the same outer diameter as a standard 700c wheel with a tire.


As I searched on Charles Pelissier. I learned he was a racer, the youngest of the three famous Pelissier brothers, (Henri and Francis the other two), who raced in the early 20th century and had their own colorful histories. Charles won 3 French National Championships in cyclocross (1926-1928). He was a tall rider and known as a sprinter. He shares a record for 8 stage wins in one Tour de France (1930) along with Freddy Maertens and Eddy Merckx. Because of his handsome looks, he was frequently nicknamed “Charlot”. The question was, what was his name doing on a cyclotouring style bike?


I located a scan of a Charles Pelissier brochure catalog from the early 1950s showing a range of bikes, from racing, sport utility to sport, including a price list in the back. The Randonneur model, that had many of the same components listed that were in the box of parts, was the most expensive bike in their line-up. The logotype on the brochure was an eccentric French roman style letter with distinctive curves, typical of late 1940s-1950s French display type. Their shop was in a fashionable district of Paris.


The frame, a 61cm, has a the bottom bracket shell with the word “NERVEX” stamped on it along with angles in degrees. I learned later this was typical to indicate at the time. The other lugs not the ornate Nervex style but slim. The fork is a classic French style crown with flat tops and a long offset, with double eyelets for fenders and racks.

The bottom bracket shell seemed to be for some kind of cartridge bearing, that was unfortunately missing. I learned that in France some shops, such as Alex Singer, would do a conversion on frames for a cartridge style BB.


Many of the parts in the box that came with the bike were weathered and worn and would need to be replaced. There were parts for a lever style Simplex front and a steel Simplex Tourist "bell crank” type derailleur that was rusty. The original MAFAC cantilever brakes were the short criterium version and the bushings looked very worn. There were steel Stronglight cottered crank arms and an alloy triple set of TA chainrings. The original Simplex tourist derailleur was in the box, but it looked as though it had been replaced with 60s Simplex derailleur that was being used when the bike was taken apart. There were some unusual pedals, I learned later were made by Piel, a high end model with pressed in bearings, but were damaged and not usable.

There was a curious detail on the Simplex front rod derailleur, the original rounded end cap that sits under the wingnut was missing and had been replaced with the identification tag usually attached to the top of the stem. The tag was engraved “R. RANSOM c/o AMERICAN EMBASSY PARIS” a clue to a former owner.


I decided to have the frame powder coated. The frame had been stripped down some time ago as indicated by a slight rust that had formed on the metal while it was in storage. Someone obviously wanted to restore the bike, but never did. The person I’d acquired it from said a friend of his had brought it over from France.

Removing the brass headset badge revealed that the frame had originally been black. Nothing fancy, perhaps sidestepping appearance for making a higher quality bike more accessible to the general public.

I had the frame powder coated a forest green. Powder coating, electrostatically applied powder that is then baked, is a dull finish when cured so to give it a gloss a clear coat is applied. It goes on a little heavy and while not as nice a finish as conventional paint, it’s a good durable finish for general use. The green was stock color, I noticed it was a similar green as found on powder coated park benches.

In my looking for (and learning about) replacement parts I found an NOS P3 Stronglight headset that came without ball bearings (the norm for the time). The next obstacle was the bottom bracket. Through a word of mouth referral, I met with Peter Johnson, a local machinist, frame builder and former amateur champion racer. He is also somewhat of a collector of vintage bikes. He knew of the cartridge bearing style bottom bracket system (it had been a way he’d made bottom brackets for some of his frames as it’s very practical set-up). So I ordered a square taper bottom bracket spindle and cartridge bearings from Phil Wood. Johnson re-tapped the Bottom bracket shell and machined aluminum end caps. He also made a center sleeve that is held in place with locktite adhesive that acts as a spacer in between the cartridge bearings when pressed on the spindle.

Now that I had the two main bearings of the headset and bottom bracket solved over the next two years I acquired new parts of the same era to get the bike on the road. The rear rack and the steel brazed handlebar stem that were very weathered I had rechromed. I located NOS MAFAC brakes for a tandem that had would provide better leverage with the guidonnet style brake levers. The Peon fenders were very oxidized had some dents and would need some finishing work. The rolled edges held wring for the generator light.

The wheels had seen better days, the rims were alloy, but without hook beads, the rim strip was the old style rim rope. The spokes were very thin and the front hub was a gigantic grand flasque style. The rear hub was a plain Atom. I rebuilt new wheels with Normandy high flange hubs and new Grand Bois 650B rims. I gave the dried out saddle a few drenches of Lexall leather treatment. The saddle, it turns out was quite well broken in with a comfortable ride despite the surface cracks.

I re-taped the bars with cotton tape and multiple coats of shellac. The brown ribbon after shellac looks like leather. Finally on a spring day in April. I took the Pelissier for a test ride. I was only planning on a short loop. But the bike was so fun to ride I ended up do a longer ride including taking the bike off road.


The bike seemed very lightweight, the slightly smaller wheels (than 700c) with Grand Bois Hetre 650B 42mm tires were amazingly responsive. I noticed the gearing was slightly geared down from 700c. The bike handled very well and was nimble. I had installed MAFAC guidonnet tourist style levers. These are fine for general riding but a bit awkward for hard braking on hills.The front rod lever also took a bit of getting used to.

My first experience riding this 650B bike was a revelation, even if the bike was far larger than the size I usually rode. The wide lightweight tires give the bike a wonderful ride.

I since then relettered the Pelissier logotype and had decals made. In California we have been in a drought the last 5 years so I’ve left the fenders and the racks off.


The Pelissier bike was made during the classic age of French bicycles and is an interesting high-quality example from that period. Whoever made this bike was a craftsman. While not a frame made by one of the more well known French constructeurs (artisan frame builders/fabricators of their own custom components) such as René Herse, Alex Singer, and Jo Routens, among others of this era, this 650B Pelissier is an exceptional, lightweight 650B bike for it's time. The frame size of this bike is for someone very tall and clearly was ridden in Paris. Charles Pelissier died in Paris in 1959 at the age of 56. Could this bike have been ridden by Pelissier himself?

I’ll never know, but the process of going through the reconditioning of this bike and finding out how well it rides despite it’s age, has been, ultimately, the most gratifying reward.


© 2022 Mark Eastman

Friday, October 2, 2015

Ode to the classic cotton cycling cap


Today whenever you see a winning professional cyclist on a podium, they're usually wearing a baseball style cap with the sponsors name, though there is nothing remotely related to baseball style caps and cycling.

Most cyclists who ride a lot don't wear a baseball cap on a bike, the large duck bill visor of this cap would just create more wind interference if tipped up or down and doesn't fit very well under a helmet.

On the other hand, the traditional cotton twill bicycle cap is made for what it is best at. Wearing while riding a bike. With it's short visor there is less wind resistance. Cotton twill is lightweight and while not an ideal fabric as it tends to absorb moisture like wearing a T-shirt, it still works well under a helmet for a layer of insulation. Plus it's a go anywhere item and folds up nicely in a jersey or other pocket

How did the professional bike racing realm change from traditional cycling caps to baseball caps as part of the team "kits" and on the podium? It seems influenced by the automotive racing realm, somewhat ironically. Or the baseball cap displays sponsor logos better on the front.

While there is always emphasis on the new and the high tech in the sports realm as far as clothing with synthetic fabrics, the traditional bicycle cotton twill cap is, and will always remain, a classic.

Friday, December 2, 2011

1973 Fuji "The Finest"

An affinity for particular bicycle brands is something that can be attained only over a period of time. I was late to becoming familiar with 80s era Fuji bikes. My first was an 80s Palisade I acquired around 2004, a bike I still use daily as a commuter. One Fuji bike led another and as of this writing I've rebuilt at least 10 other Fuji bikes. Vintage Fuji, even their better models have never quite had the same status as European bikes, but many of which beyond the lowest end models are fairly good.

As a follow-up to my last post on cotton handlebar tape, here's more of the story. I'd recently acquired a 1973 Fuji Finest with almost all original components, including the (super lightweight) tubular wheelset and rare original Fuji Belt leather saddle. This Fuji was originally a racing model, second to the Fuji Professional. The geometry is very responsive and stiff. The tubular tires still held air, but tires needed replacing. It had been retrofitted with Suntour "Power Shift" ratchet shifters on the down tube of the frame. The Power Shifters were a precursor to index shifters probably added in the 80s. Although outmoded now by today's standards with STI, the Suntour shifter design still works remarkably well. I switched from the tubular wheelset to a vintage MAVIC clincher wheelset with rare Specialized hubs and this bike still rides exceptionally well for when it was made.

Some of the decals were missing and I found replacements. One interesting and clever detail is the chain hanger built into the cable stop for the rear derailleur that keeps the chain off the ground when removing the rear wheel.

The Fuji Finest is a superb example of a classic vintage Japanese racing bike in the traditional European style.
Epilog:

A few years later, I encountered the same exact bike in the North Beach area of San Francisco parked in front of cafe. It had been converted to flat bars and the wheels were different. Then the day after the Eroica California 2016, a car pulled up with two bikes on the back, and one was, again, the Fuji Finest! The owner had ridden it in Eroica the day before.

Sunday, July 17, 2011

Cotton handlebar tape: It's a wrap

When you buy a used bike you often don't completely know what you're getting into. One bike from the early 1970s I acquired had some traditional cotton handlebar tape and I decided to rewrap the bars with same kind bar tape like the original.

I thought this would be easy. But, I was mistaken. It turns out the original owner, rather than replacing the old tape, simply wrapped over the tape that was on the bars. I had to peel back 3 layers to get to the bars.


Initially I tried a razor blade, but the adhesive on the base layer of tape had dried quite a bit, making this more difficult. I was able to soften up the dried up adhesive by pouring rubbing alcohol onto the old bar tape and letting it sit for about 15 minutes. Afterwards, it was much easier to remove the old tape.

I used lacquer thinner to remove what residue of the adhesive layer that was left with a rag, the tough parts scraped off easily now with the razor blade. Once all the old tape was removed, the vintage aluminum bars revealed a very nice patina.


Wanting to retape the bars in the traditional style, I'd bought some Velox cotton tape from a local bike shop. The Velox tape proved to be a challenge as well. It had probably been aged on shelf for a while and had dried out somewhat. The adhesive wasn't as sticky as it should be and didn't stretch very well making it hard to wrap without forming creases as you wrapped it. I had to pull it very hard and wrap it once to stretch and then undo and rewrap again to make it work.


Once I got the bars wrapped using the full length of the tape to exactly end where it should be near the bar stem on top, I gave the tape a coat of clear shellac that turned the tape color to a beautiful deep red.


I'll give it a second coat in a day or so. I don't know what it is about cotton tape and shellac, but this has it's own particular look that no modern bar wrap emulates, plus it has a great grip.

© 2011 VeloTouriste

Thursday, June 16, 2011

Local mix: cycling, California almonds and advertising

As a cyclist who frequently eats almonds or walnuts while on a bike and off, when I came across an ad circa 1991 with Tour de France champion Greg LeMond promoting California almonds recently, I was pleasantly surprised.


The ad was originally done for the California Almond Board. It seems amazing and rare today to see an ad with a Tour de France champion that isn't promoting a bicycle brand, a component or clothing manufacturer, an endurance supplement or a foundation... but, regional agriculture!

While commercial energy bars aimed at athletes had been around since 1983, i.e.: Powerbar (or "PowerBrick" depending on the ambient temperature), what's interesting is that this lifestyle/health-oriented ad promoting almonds as a healthy snack, was published in the December 1991 issue of Bon Appétit magazine.

The headline of the ad reads "California Almonds, The Healthy Snack You Can Win With" with the additional tagline "Great nutrition in a nutshell".

With it's clever copywriting, illustrated logotype and almond bordering, typography and layout (using artificially condensed Plantin type for text), the ad is polished, but seems to mimmick other design work being done around the same time for places like The Nature Company.

One amusing design flaw in the ad is the yellow rectangle with the headline plastered in the lower middle. Visually this gives the impression LeMond is about to run into a barrier he may not have seen while he's smiling at the camera. So much for healthy snacks.

Today, many farmers are pretty much at the mercy of big companies and/or brokers that tend to set modest prices on what they're willing to pay California growers, since almonds now come from all over the world. So it's interesting to see an ad like this from 20 years ago specifically promoting California almonds.

It would be great to see more ads like this in support of local agri-business rather than big name cycling brands. Maybe someone could sponsor a team. If someone did, I'd vote for "Team Almond Crunch"!

© 2011 Velotouriste

Thursday, May 19, 2011

On Commuting: Every Day is a Bike to Work Day

May 12 was bike to work day. To me, every day is a bike to work day. Why shouldn't it be? In January 2011 I stopped driving to my work from East Palo Alto to San Jose and have commuted entirely by bike and Caltrain.

In the last 10 years since I've lived on the Peninsula, the SF Bay Area seems to have become increasingly crowded on highways, for a variety of reasons. While Bay Area transit by bus and BART is good, suburbia basically is not conducive to public transit compared to the city.

But there are alternatives. Weekdays, I ride about 10 miles a day commuting by bike and taking CalTrain. It takes about an hour, I could drive in 1/2 the time. But, I get good exercise, and I never have to sit in traffic — this is the best reason for riding to work. I bought a CalTrain monthly pass that gives me more incentive to ride.

It's hard to commute by bike at first, you have to have all your gear together (key's, wallet, phone, toolkit, extra tubes, pump, change of clothes—check). But once you do this regularly, you get your system down. I prefer to commute in bike clothes and carry a change of clothes for work. Riding in jeans isn't great and wears these out. You have more freedom of movement with bike clothes. I carry an extra small lightweight musette bag so I can easily take the basics (tools, pump tube) if I ride somewhere for lunch. I also carry a canvas shopping bag and stretch cords that makes it easy to do a shopping run on my way home and strap the bag to a rear rack.

I prefer a traditional lugged steel road bike as opposed to a current hybrid bike with an upright position or mountain bike that is great for trails, but generally overweight for the street.

On a road bike you can ride fast and get more leverage with brake levers on drop bars when you need to accelerate quickly at times (i.e.: like when you're riding in traffic) — plus not feel like you're riding in the La Brea tar pits whenever you encounter wind since you can get low, drop a gear and power on.

This is just my preference, but any bike you ride to work is good. It helps the Bay Area environment. Taking CalTrain supports public transit as well.

To those driving to work: consider biking as an alternative. When you do, you'll pay less for car expenses ...and, get some fresh air in the process. © 2011 VeloTouriste.

Sunday, April 3, 2011

Upgrading 27" wheels to 700c

Working on a vintage bike recently I wanted to rebuild this as close as possible to the original version, with one exception, the wheelset.

The bike came with 27" wheels with high quality Araya alloy rims and Sunshine hubs. Very good but the rim edges where the tire meets the rim are straight with no lip to hold a modern clincher tire bead. Most 27" tires only allow 90 psi max. I had mounted Panaracer Pasela 27" tires on these rims and they worked well. The rear wheel had a flat spot, but not noticable except on fast descents. The straight edge rim of 27s left me wanting me to be able to run a tire at 95-100psi that with these rims might be a problem. I rode this pair of 27" wheels with the Paselas over Ebbetts Pass in the Sierras and on a few others rides without a hitch. But to my shock I saw the 27" rims had no lip after fixing a flat. For tires, you really don't want to mess around, so this was the main reason for switching to a modern 700c wheelset As a replacement, I had built-up a new wheelset with some NOS Maxi CAR high flange hubs and of Mavic Open Sport rims. These are fantastic riding wheels.

The 700c (622mm) wheel diameter is shorter than 27" (630mm) but easily adaptable to most bikes that originally came with 27" wheels. I've upgraded a few bikes with 27" wheels to 700c that allow much more of a range in tire widths and tire types.

Plus you can use tubes with lightweight presta valves that are better suited for road bikes than schrader style valves commonly found on 27" and MTB wheels. © 2011 VeloTouriste.

Sunday, February 27, 2011

Rebuilding a "bike-boom" era Peugeot

After working on bikes over time, you may encounter recurring situations requiring an inordinate amount of patience.

French bikes always present their challenges, mainly with their obsolete threading. Most recently, it's been on rebuilding a 70s bike-boom era Peugeot UO-8 sport/touring bike. Although Peugeot has made great bicycles such as the renowned PX-10 racing bike, the UO-8 was one of the lower-end models, typical of the large volume of Peugeots sold in the US in the 70s for the mass market. I brought it home and considered how it could be best rebuilt. It made sense to make it a single speed, as the older, heavier steel frame would be well suited to a stripped down utility bike.

French bikes have unique threads that are difficult to deal with when you want to replace bearings. The steel cottered crankset and bottom bracket were pretty much obsolete. Once I actually was able to remove one side of the crank (extracting the pin that holds the crank arm) I found that trying to replace this with a square taper bottom bracket spindle wasn't going to work because the cottered bb spindle has different dimensions.

So I retrofitted it with aftermarket French thread bb cups and a modern sealed IRD bb. It turns out I managed to somehow cross thread one of the bb cups—no matter how much I tried, this just wasn't going to work.

Next stop: machine shop. I had the bottom bracket shell reamed and re-tapped.

Since spray can paint isn't very durable not being heat cured, I took the frame to a powder coater and had them redo the frame in a dark metallic blue. They did an excellent job and applied a clear coat that gives the normally dull powder coat finish a high luster.


I built the frame up as a single speed with a track wheelset. I chose to keep the original centerpull MAFAC Racer brakeset that has it's own history. Based near Auvergne region of France, MAFAC is an acronym for Manufacture Auvernoise de Freins et Accessoires pour Cycles.

More races have probably been won using on MAFAC Racer model brakes than any other brakes ever made. They present a mechanical challenge to adjust. The pads need to be exactly perpendicular to the rim when they come in contact and doing this is a feat by itself. Getting the right amount of gap between the rim and the pads is also somewhat of an art—enough gap so they don't rub, but tight enough so the brakes have enough grab, that has to do with the length of the brake straddle wire and where the center cable yoke is positioned...

The old black pads these came with have long since dried out and end up squealing and leaving deposits on rims. I replaced these with Kool-stop salmon pads. Also, the bushings for the bolts that hold the arms can wear over time and the slop can contribute to break squeal. If the brake assembly isn't lubricated this can rust and bolts can break. Although I lubed everything before reassembling and readjusting the brakes on this bike, I still managed to snap one of the brake arm mounting bolts and a center yoke bolt. Fortunately I had an extra set and I'll drill-out the broken bolt on the old pair sometime with a drill press. Once you get these brakes dialed in though they work well.


A general rule of thumb with all older brakes sets: you must lube all of the parts because these will surely break when you try to retighten things if they get corroded.

Once I retrofitted the Peugeot with new wheels, a new single speed drivetrain and new brake levers, I was having a really hard time with getting the rear brake to not squeal. I tried to "toe-in" the brakes and tighten the brake arms (why I broke one) to no avail. Eventually I reverted to a tip a mechanic gave me who's worked on cyclocross bikes "Sometimes all you can do is toe 'em in backwards".


After assembling the bike, I relettered the Peugeot logotype script from a vintage 50s catalog and had decals made. This old Peugeot is now transformed to a new life as a single speed and looks and rides fantastic.

The bike was too large for me and I ended up selling to a buyer in San Francisco. So if you see this bike around SF, you'll know this was rebuilt by someone who appreciates French bikes no matter what grade.

Sunday, February 20, 2011

Replicant retro bike encounters

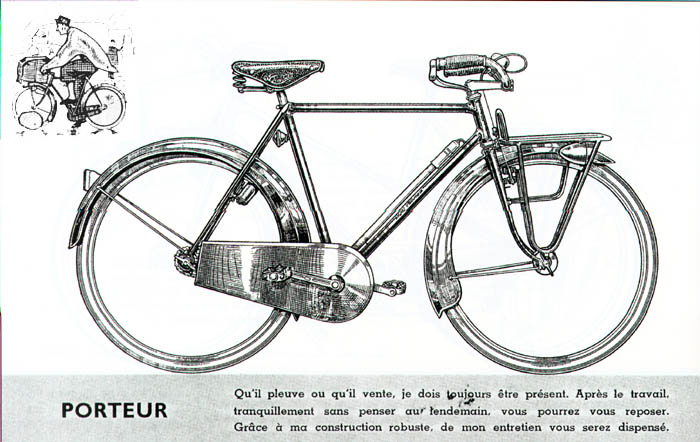
Riding back from work on my weekday commute recently on Caltrain, there was a woman in the bike car with a fairly opulent "mixte" bike (in the US, known as a women's bike with a lowered top tube and easier to step-over frame). It was made by Velo Orange, built-up in the classic French porteur style. It was equipped with the full array of VO branded parts, porteur handlebars, Peugeot style patterned fenders and racks with a wide platform porteur style rack up front.

In France porteur bikes were used by newspaper couriers often carrying very heavy stacks of newspapers, distributing them around the city. The VO bike had the porteur style rack and handlebars on these bikes, in a simple inverted U shape. It was medium blue with brightly contrasting orange cable guides. Not the usual commuter bike seen on CalTrain—as bikes can get beat up by other sometimes careless bicycle commuters.

I spoke with the owner of the VO mixte and she mentioned her boyfriend bought it for her at a local shop. She commuted from SF via CalTrain to San Jose had had a few different problems with this bike and really disliked it as a result. She'd had a blowout and the tire had to be replaced. The bike was set up with 700 x 28 Panaracer Pasela tires with gum sidewalls, they were blackened with brake pad residue from riding in wet/rainy conditions. Paselas are great for touring, but they don't take a city street beating so well. She mentioned previously she'd been riding a single speed that was "indestructable" in comparison and now wish she hadn't sold it.

As I sat riding the CalTrain, looking at the VO mixte in front of me, I noticed the plating on the front porteur rack wasn't so great and the rack was set-up too high and the fender was too short in front. Maybe the rack was added later. It had lower-end Tektro brakes. I couldn't help thinking this bike is basically a replicant of other better bikes from other more high end frame builders, that-is, this was a consumer-level replicant porteur style bike, (replicant, as used in the film "Blade Runner" based on the Philip K Dick story) compared to better made specialty bikes in the porteur or randonneur style such as Kogswell, Rivendell among other more reputable frame builders.

Knowing that the frame was made under the Velo Orange brand, using an art deco era typeface Parisian for it's logotype and most all of it's retro brand appearance, plus the fact that most all of the parts it sells under the VO brand are contracted out and made in Taiwan, I didn't say anything to the owner.

While the bike had a cool retro look, just a few problems can change any rider's view, especially if they are not so familiar with bike details. I understood the intent of the boyfriend in setting her up with a nicer bike—I know that setting up a bike for any friend can be a bit of challenge, since everyone's bike experience is subjective based on what they like.

Was this bike as good as perhaps an older bike built-up with better components as an urban commuter? After the owner mentioned she preferred her old single speed and would probably sell the VO, I couldn't blame her.

Sunday, February 6, 2011

Guacamole... and cycling beyond the end zone

Today is Super bowl sunday, the culmination of the NFL football season. This is typically celebrated by people having parties at their homes with friends and/or going out to their local sports bar to revel for the best teams of the season in the carnage known in the US as the sport of football. Some people may watch more interested in the blockbuster half time show, or the unveiling of the multimillion dollar showcase of TV ads, a kind of a side super bowl of what the ad industry can do for clients willing to spend millions of dollars.

Fans gear up for this day. Just the other day I was at a local market and overheard a 20-something couple asking the grocer about making guacamole (chip dip): "How many avocados do we need to make guacamole for 9 people?" Although there are many varieties of avocados from California the market currently only had ones from Chile. The produce staff member responded with helpful advice. I was thinking. "Hey, guacamole isn't just for football parties!" but it underscored to me how we now live in a world where produce can be imported from elsewhere when it may not be in season where we happen to live. Lucky us.

Perhaps Super Bowl Sunday should be renamed "Super Guacamole Sunday" to help support avocado growers and the chip dip of NFL champions. That way fans can connect more with both their favorite sport and the avocados that help with the celebration.

Meanwhile: Super Guacamole Sunday, to cyclists, means something different. While NFL fans are occupied with enjoying the game on TV with friends, light beers and guacamole dip, this translates to fewer cars out on the road.

This day was no exception. Leaving in the mid afternoon today under perfect sunny clear skies, I did one of my regular 24 mile short loop rides and was pleased to find almost zero traffic.

On my way back I saw a christmas tree out on the street. This was really late, then I remembered neighbors I knew as a kid who would keep the tree up until the Super bowl game.

If people drove less and rode bikes more, perhaps roads could be more like they are on a Super Guacamole Sunday.

Friday, December 17, 2010

Rainy days mean winter bike projects

Between a flurry of work winding down to the end of the year, a few other projects and the rain lately I've managed to squeak-in a few hours on some back burner projects. In the last few years it seems like it's been very difficult to find good vintage steel bike frames ripe for rebuilding, they can be overpriced, garage sale/thrift store turn-overs, and/or not worth the trouble. On ones that you might come across, that appear less than optimal, well if you have lemons, make lemonade!

Take French Peugeot bikes for example. Although Peugeot is an established name in France, unfortunately most of what they imported to the US during the bike boom in the 70s onward, with a few exceptions was pretty much standard production fair. Many with steel cottered cranks and other run-of-the-mill components with the possible exception of MAFAC racer center-pulls. The now obsolete French threading on these bikes makes them more of a challenge. But despite their quirks, old French production bikes are still usable.

One of the reasons why better vintage steel bikes and frames are harder to find these days is partly due the popularity of single speed and fixed gear track style bikes ridden on the street.

For roadies who happen to like more than one gear, this can be frustrating. Granted, older heavier steel frames being what they are, a single-speed or fixed gear conversion, if your riding mostly on flat terrain can make sense. I commute regularly by bike and CalTrain and single speed and fixed gear bikes are very popular. They're relatively light, simple, require less maintenance and look cool. They're like a lightweight streetfighter, when you just want to get to where your going on flat terrain with no frills,

Previously while working in SOMA SF for a small boutique design firm (translation: sweat shop), I commuted by bike and CalTrain on a metallic blue Fuji I'd rebuilt as a single speed. Needing to get to CalTrain in a somewhat timely manner, I geared it 50x16. Not great for starting out (knee torque) but this old steel bike would fly once you got going. I sold it to a guy in Portland. That was one sweet bike.

Back to the common French bike, with these bikes, you can get French cups for current sealed Bottom brackets and there are a few repro french headsets around. You can always change the fork so you can use a more current diameter quill stem—French stems are a few millimeters smaller, similar to older Schwinn or BMX.

So if you can find something in the way of French bikes for a good price. Go forth and make use of it! —© 2010 VeloTouriste

Monday, December 6, 2010

Totally wired.

Yesterday spent a few hours mounting a dynamo generator and lighting on my vintage commute bike. I mounted a Sanyo bottom bracket dynamo that mounts to the chainstays infront of the the rear fender. I mounted a front Lumotec halogen 2.4w headlight to a bracket that attaches to the fork crown/brake assembly. For the rear I mounted a Soubitez .4w light to a stainless tab that attaches to the rear fender. The rear light is now situated behind the rear rack. The Sanyo has less drag than sidewall dynamos. The halogen light isn't great but will do until I upgrade to an LED light. Having a generator lighting set-up on the bike makes it completely functional anytime which is great, without having to worry about batteries for lights.

© 2010 Velotouriste

Wednesday, December 1, 2010

Under the wire bead.

I recently removed the tires on a vintage 650B wheelset from a vintage 1950s Pelissier randonneur bike I've been working on. The tires were "Dunlop Balon Leger" with sidewalls completely toast. The tires were difficult to remove, I ended up cutting the beads with a pair of brake cable cutters. Much to my surprise, tire beads had multi-strand wires, each about the size of one mondern wire bead. The rims had cloth rim strips woven in a tubular style. The rims also have a very interesting profile, but with non-hook bead rim edges making them only suitable for lower pressures.

© 2010 Velotouriste

Sunday, November 14, 2010

Fall Sonoma rides

This weekend, did two leisurely rides with my girlfriend in Sonoma County. Although my gf has done a few triathlons, she doesn't ride as much as myself, so when we do rides I try to find a reasonable route. My solution: I ride a vintage touring bike with pannier bags. It's a good compromise. We enjoy the day and I get my fill as far as riding with my handicapped loaded touring bike. I set her up with a very nice vintage Bridgestone RB-1 with a Nitto riser stem that's easier on her back as far as riding position.

Tuesday, November 9, 2010

The best rides are those you discover

I've had a few exceptional rides this year I hadn't done before, that when I did were a discovery. They were rides that I'd thought about, checked the general route and the terrain, but didn't really know what it would be like. On rides like this, I've been the most motivated. Although, I come prepared on these rides I often start and say to myself, "can I do this?", "will the weather be ok?". When you do the ride and it all works out, it is an awesome experience.

Get out of your environment and take rides you wouldn't normally do, the rewards and experience are great.

Saturday, October 2, 2010

The right tool for the right job…

If you've ever changed a chainring on a crankset yourself, you'll know this can be an awkward task. You have to use an allen wrench plus a separate wrench for the slotted bolt on the opposite side. For tightening, while you can position the back wrench so it holds against one of the crank arms, it can be tricky since there's nothing to hold the back wrench in place against the slotted bolt. If you're not careful when tightening, you can easily cut yourself, especially if you try to tighten the allen key towards the chainring teeth. VAR in France used to make a tool for this that makes installing or removing chainrings easier…and with less bleeding, the VAR #352.


I recently acquired a vintage version of one of these. Though the way it's made may be slightly crude by today's standards, the VAR 352 is a cleverly designed tool, complete with a spring loaded arm that holds the built-in allen key in place.

Merci VAR

Monday, August 30, 2010

Bike commuting by CalTrain: Part 1


Since 2007 I have commuted to work by bicycle and/or a local SF Bay peninsula train known as CalTrain. In 2007 I rode a fantastic vintage Fuji S-12-S I rebuilt as a single speed and commuted to SOMA SF. Subsequently I've commuted to the southbay as well. Lately I've been doing this more and since the beginning of August, haven't driven to work.

Commuting by bike and train forces you to get your routine down, getting everything together, but the more you commute by bike, the easier it is. With bike commuting, I love the freedom of not having to deal with traffic or waiting forever at stoplights (well, you can wait, but if it's clear, it's an option). Having to get to the train involves a certain lower end form of riding similar to amateur stop-sign-interval training.

There are lots of kinds of people who ride CalTrain. There are usually one or sometimes two train cars that are designated specifically for bicycles. Since people are going different places it's often useful to tag your bike with your destination so other riders can know where you're going and can stack their bike next to a bike that is going either to the same stop or further down the line.

A few common bike commuting CalTrain annoyances:

Bikes with no desitination tag
Adding something to a bike to let others know where you're going is a simple thing to do. However some bike commuters are lazy or don't care.

Riders bringing unreasonably large bikes onboard.
It's often funny to watch bike commuters wrestle with large cruisers or heavy duty mountain bikes. These bikes take up more room and on a crowded train, this can matter. In this case, I appreciate single speed/fixie bikes.

Riders stacking bikes all pointed in the same direction.
It works better if you alternate bikes so they're stacked pointing in the opposite direction since they tend to fit better. CalTrain signs state this but are unreadable, if only they could be more graphic.

Passengers without bikes sitting in the bike car
Some passengers jump on the first car even though they don't have a bike even though there are 500 other seats on a train.

Cel phone talkers
Passengers who blather on and on while riding CalTrain should have their phones confiscated.

Otherwise biking and taking Caltrain is great and definitely better than driving.